Running CVP on Proxmox
April 7, 2024 Leave a comment
With VMware jacking up the prices and killing off the free version of ESXi, people are looking to alternatives for a virtualization platform. One of the more popular alternatives is Proxmox, which so far I’m really liking.
If you’re looking to run CVP on Proxmox, here is how I get it installed. I’m not sure if Proxmox counts as officially supported for production CVP (it is KVM, however), but it does work fine in lab. Contact Arista TAC if you’re wondering about Proxmox suitability.
Getting the Image to Proxmox
Oddly enough, what you’ll want to do is get a copy of the CVP OVA, not the KVM image. I’m using the most recent release (at the time of writing, always check Arista.com) of cvp-2024.1.0.ova.
Get it onto your Proxmox box (or one of them if you’re doing a cluster). Place it somewhere where there’s enough space to unpack it. In my case, I have a volume called volume2, which is located at /mnt/pve/volume2.
I made a directory called tmp and copied the file to that directory via SCP (using FileZilla, though there’s several ways to get files onto Proxmox, it’s just a Linux box). I then untared the OVA with tar -xvf (I know, right? I had no idea it was just a tgz ball).
root@proxmox:/mnt/pve/volume2/tmp# tar -xvf cvp-2024.1.0.ova
cvp.ovf
cvp.mf
cvp-disk1.vmdk
cvp-disk2.vmdk
In my case, this gave me four files, two of which are vmdk disk files.
Importing the OVA to Proxmox Inventory
The next step is to import the disks and the VM into system inventory. You’ll need to pick a volume to place it in, as well as a unused VMID. In my case, I’m using volume2 and the VMID of 109, which was available in my environment.
root@proxmox:/mnt/pve/volume2/tmp# qm importovf 109 cvp.ovf volume2 --format qcow2
...
transferred 0.0 B of 1.0 TiB (0.00%)
transferred 11.0 GiB of 1.0 TiB (1.07%)
transferred 21.8 GiB of 1.0 TiB (2.13%)
transferred 32.8 GiB of 1.0 TiB (3.20%)
transferred 43.7 GiB of 1.0 TiB (4.27%)
...
This process will take a few minutes at least. You’ll see it refer to 1 TiB, but don’t worry, it’s thin provisioned so it’s not actually going to take up 1 TB (at least not initially).
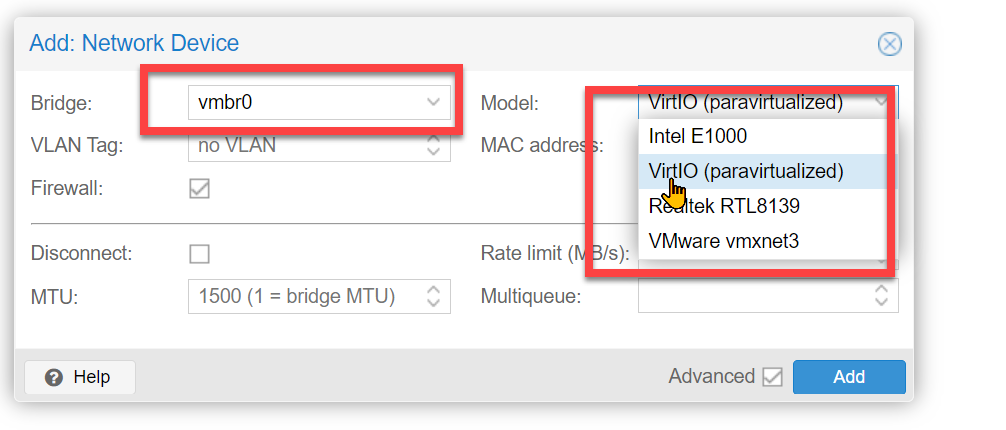
You should now see the VM in your Proxmox Inventory. I would change the name, as well as up the RAM to something higher (it starts with 28 GB, I put it at around 36 GB of RAM). You’ll need to add a NIC as well. Put it on a virtual switch (bridge) and select VirtIO for the NIC model.

From there you can follow the install CVP instructions. Remember you’ll need both forward and reverse DNS records, as well as access to an NTP server to complete the install.